The Analysis widget provides an easy way to use ArcGIS Online or ArcGIS Enterprise spatial analysis tools in your application. With 25 analysis tools, you can configure one tool or multiple tools in a widget. See the Perform analysis section of the ArcGIS Enterprise help for an introduction to spatial analysis, the license requirements to access analysis tools, and details about the usage of each tool. If you're a developer, you can access these tools via web APIs. For more information, see Spatial analysis service REST API.
Analysis tools must have access to the data used by the layers and services on which you run them. If you use ArcGIS Server map or feature services, the analysis tools must have access to the data; therefore, the URL to the service must be a public URL or be on the same network as your portal.
License:
If you include this widget in your app, confirm that your end users have the required privileges described in the Use the Analysis widget section below.
Configure the Analysis widget
- Hover over the widget and click the Configure this widget button
 to open the configuration window.
Note:
If you need to add the widget to the app first, click a widget placeholder on the Widget tab. In the Choose Widget window that opens, select the widget and click OK.
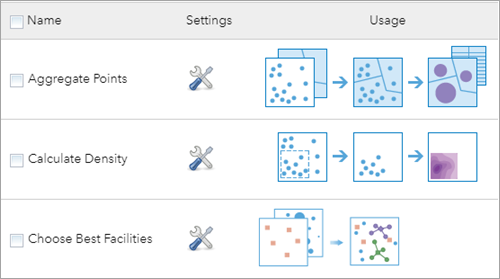
- Tools are listed alphabetically in the configuration window. Choose the tools you want to include in the widget.

- Click the settings icon next to your selected tool. The following options are available:
- The tool display name—Provide your tool name.
- Show help links in the widget—Controls whether to show help links in the widget.
- Show option to use the current map extent—Controls whether to show the option to use the current map extent.
- Save the result in user's account—Controls whether to allow users to save the result in their accounts.
- Show ready to use layers from ArcGIS Living Atlas of the World—Controls whether to show ready-to-use layers from ArcGIS Living Atlas of the World.
- Allow to export results---Controls whether to allow users to export the result to CSV, Feature Collection or GeoJSON formats.
- Include route layers—Specific to the Plan Routes tool. It allows users to open the resultant routes in the pop up by clicking Open route to view the directions that were generated for the vehicle. To achieve it, make sure the followings are in place:
- Check the option of Include route layers in the tool setting
- Make sure the Include route layers option is checked when you run the tool in the widget.
- Add the Directions widget in the app.
- Repeat step 3 if you have more than one selected tool.
- Click OK to save the configuration and close the window.
Use the Analysis widget
To perform analysis, the administrator of your organization needs to grant you certain privileges. To use any of the analysis tools, you need the following privileges:
- Create, update, and delete content
- Publish hosted features
- Spatial analysis
Certain tools need additional privileges such as network analysis and GeoEnrichment. See Perform analysis for more information. If you don't have required privileges, the corresponding tools will not be available in the widget panel.
Note:
Go over the Publish Routing Services Utility topic to learn specific information on data requirements.- Verify that you are signed in to your organization with privileges to perform analysis.
- Click the widget icon in your app to open the widget panel. If more than one tool is configured, choose tools one at a time to execute. If only one tool is available, it activates automatically. Click the help icon
 for information about the tool.
 - Choose an input layer from the drop-down list, configure the parameters for the tool, and click Run Analysis.
- Choos a layer from your map.
- Use Browse Layers to choose any layer in the portal to which you have access.
- Use Choose Living Atlas Analysis Layer or Choose Analysis Layer to view and select a layer from a preconfigured analysis group. If the portal administrator has configured the portal to access Living Atlas analysis layers, you will see the first option. If the portal administrator has configured the portal to access layers from a custom group, you will see the second option.
- When the tool is running, the execution messages display in the panel. Click the cancel icon if you want to cancel the job.
A job for a tool consuming credits cannot be cancelled.
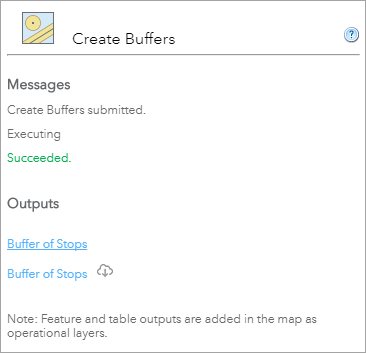
When the job is successful, the result is saved to My Content in the Contents page. Click the item link under Outputs to view the item details in your portal. In addition, the results as a feature layer or layers or a table or tables are automatically added to the map as operational layers.

If the job is not successful, an error message displays in red. Click Back to return to the parameters' configuration. Additionally, you may see the output name with an export button if you choose the option to export the files.
- If you have more than one tool, click Home to choose other tools.
If you don't have required privileges to run a tool, the tool will not display in the widget panel. Certain utility services are also required for some of the analysis tools. Here is a list of the required utility services for different analysis tools. These services need to be configured in organization settings by the administrator of your organization:
| Analysis Tools | Required Utility Services |
|---|---|
Enrich Layer | GeoEnrichment |
Enrich Layer (Travel modes) | GeoEnrichment + Service Area (Asynchronous) + Routing Utilities |
Create Watersheds | Hydrology |
Trace Downstream | Hydrology |
Create Viewshed | Elevation |
Choose Best Facilities | Routing Utilities + Location Allocation (Asynchronous) |
Connect Origins to Destinations (Travel modes) | Routing Utilities + Route (Asynchronous) |
Create Drive-Time Areas | Routing Utilities + Service Area (Asynchronous) |
Find Nearest (Travel modes) | Routing Utilities + Closest Facility (Asynchronous) |
Plan Routes | Routing Utilities + Vehicle Routing Problem (Asynchronous) |
Summarize Nearby (Travel modes) | Routing Utilities + Service Area (Asynchronous) |
Also note that the Extract Data tool requires the extract capability be set in the service.
You have the following options when choosing a layer to analyze:
See the Create a data store topic, for more information about configuring a Tiled Cache Data store.
Tip:
See Use the spatial analysis tools for more information about the configuration dialog box.
Tools and server license
Below is a list of analytical tools that require a standard or advanced GIS Server license.
| Analysis tool | GIS Server Standard | GIS Server Advanced |
|---|---|---|
Aggregate Points |
|
|
Calculate Density* |
| |
Choose Best Facilities |
| |
Connect Origins to Destinations |
| |
Create Buffers |
|
|
Create Drive-Time Areas |
| |
Create Viewshed |
| |
Create Watersheds |
| |
Derive New Locations |
|
|
Dissolve Boundaries |
|
|
Enrich Layer |
| |
Extract Data |
|
|
Find Centroids |
|
|
Find Existing Locations |
|
|
Find Hot Spots |
|
|
Find Nearest |
|
|
Find Outliers |
|
|
Find Similar Locations |
|
|
Interpolate Points* |
| |
Join Features |
|
|
Merge Layers |
|
|
Overlay Layers |
|
|
Plan Routes |
| |
Summarize Nearby |
|
|
Summarize Within |
|
|
Trace Downstream |
|
- Requires additional configuration of a network service. This can be an Esri provided service or your own – see Directions and Routing for more information.
- Requires additional configuration of an elevation service. This can be an Esri provided service or your own – see Elevation for more information.
- Requires additional configuration of a hydrology service. This can be an Esri provided service – see Configure utility service: Hydrology for more information.
- Requires additional configuration of a geoenrichment service. This can be an Esri provided service or your own – see Configure utility service: GeoEnrichment for more information
- Requires Advanced Server license.
